How to set up Webflow with Cloudflare proxy for your domain
⚠️ Important: Don't follow these steps until you've been notified by Webflow that your site has transitioned to Cloudflare.
If you're running your website on Webflow and want the performance and security benefits of Cloudflare, you don't have to choose between them. Cloudflare offers an Orange-to-Orange (O2O) setup, which lets you proxy all traffic through your own Cloudflare zone before it reaches Webflow. This gives you control over caching, security rules, and other Cloudflare features while still hosting your content on Webflow.
It’s worth noting that Webflow is in the process of migrating to Cloudflare. Previously, Webflow relied on Amazon CloudFront and Fastly, and some sites still run through these providers during the transition. However, by default, the Cloudflare proxy option (orange cloud) at your domain level will not work. The reason is that even though Webflow runs on Cloudflare behind the scenes, enabling the proxy directly can interfere with how Webflow provisions and renews SSL certificates. Using the O2O setup avoids this conflict while still giving you Cloudflare’s features.
Here's how to configure it step by step using an example domain: examplewebsite.com.
How Orange-to-Orange (O2O) Works
Understanding the traffic flow can be helpful before deciding whether to move forward. With O2O enabled, here's exactly what happens when someone visits your website:
Traffic Flow: Visitor → Your Cloudflare → Webflow's Cloudflare → Your Website
First stop: Your Cloudflare zone - When a visitor requests your website, their traffic hits your Cloudflare zone first. This is where all the settings you configure (WAF rules, bot management, rate limiting, Workers, etc.) are applied.
Second stop: Webflow's Cloudflare zone - After your Cloudflare processes the request, it forwards the traffic to Webflow, which runs on their own Cloudflare infrastructure. Webflow's settings are applied second.
Final destination: Your website content - The request finally reaches your actual Webflow-hosted website content.
Key point: With O2O enabled, the settings configured in your Cloudflare zone will be applied to the traffic first, and then the settings configured in Webflow's zone will be applied to the traffic second. This dual-layer approach gives you the control you want while maintaining Webflow's capabilities.
Why not just rely on Webflow's Cloudflare set-up?
If you point your domain directly at Webflow, you're locked into their Cloudflare configuration — and for most people, that's probably fine. However, by routing your domain through your own Cloudflare instance first, you can:
- Apply WAF, bot management, and rate limiting.
- Use Cloudflare Workers for custom logic.
- Control page rules, redirects, and caching.
- Keep full visibility of your traffic.
- And much more.
In short: Cloudflare sits between your visitors and Webflow, giving you all of Cloudflare's power while Webflow continues to serve your content.
Step 1: Add your domain to Webflow
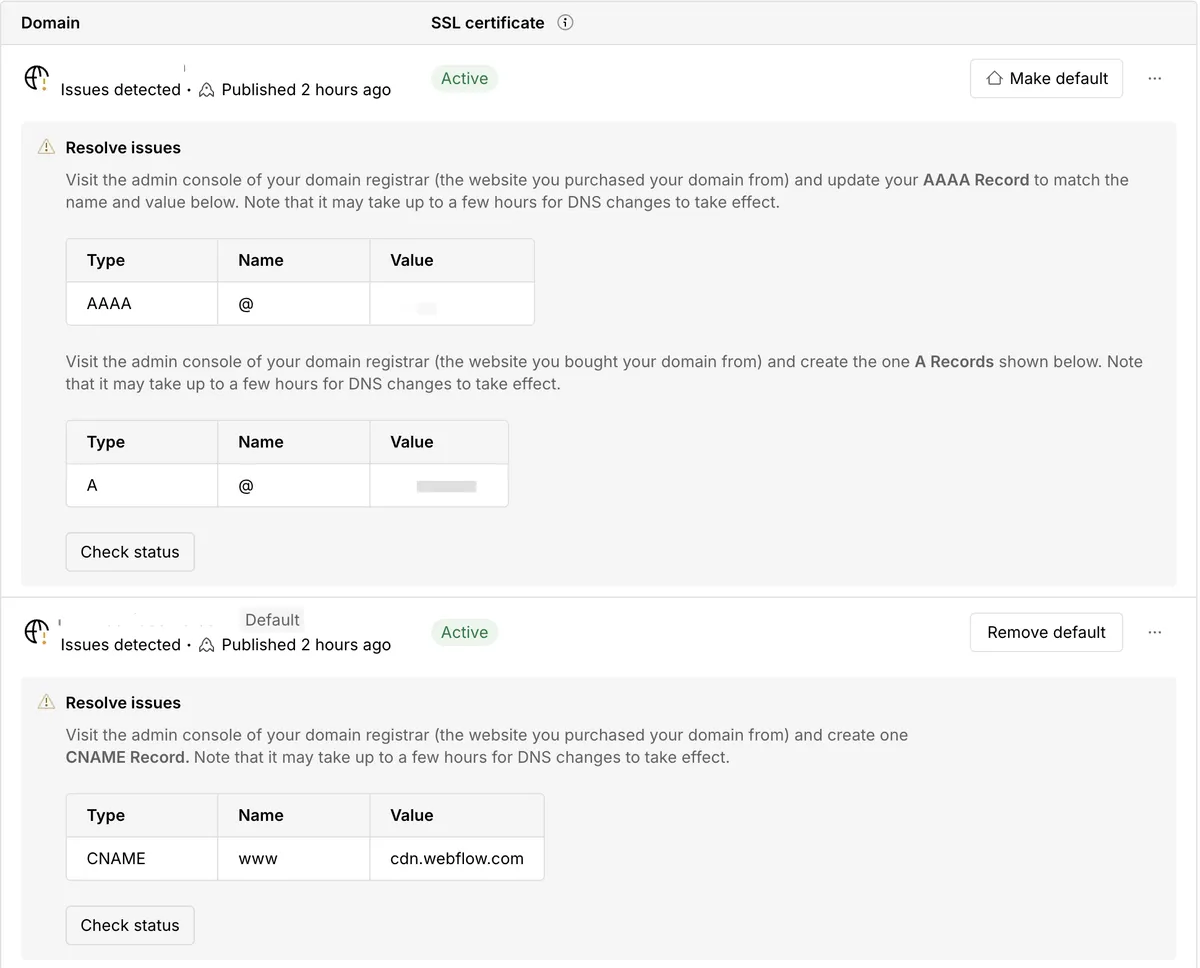
In Webflow Project Settings → Hosting, add your domain (e.g., examplewebsite.com and www.examplewebsite.com). Webflow will prompt you to add A and AAAA records for the root, and a CNAME for www.
If you go this route, you will see Webflow throw errors which is normal — I've included a screenshot below showing the typical error messages you'll encounter during this process.

For reference, here are example A and AAAA records that Webflow might suggest (but you'll ignore these for O2O setup):
Example A Records:
75.2.70.75198.202.211.1
Example AAAA Records:
2606:4700:10::ac43:1b5a2606:4700:10::6816:aeb
Ignore the A/AAAA instructions — those are for direct setups, not Cloudflare O2O.
Step 2: Configure Cloudflare DNS
Inside your Cloudflare DNS dashboard:
- Delete any existing
AorAAAArecords for your root domain.- Example:
198.202.211.1or2620:cb:2000::1.
- Example:
- Add CNAME records like this:
| Type | Name | Target | Proxy status |
|---|---|---|---|
| CNAME | examplewebsite.com | cdn.webflow.com | Proxied |
| CNAME | www | cdn.webflow.com | Proxied |
Both must be proxied (orange cloud), not "DNS only."
Step 3: SSL/TLS settings
In Cloudflare → SSL/TLS, set the mode to Full (strict).
Why strict?
- Webflow issues valid SSL certificates from Let's Encrypt / Google Trust Services.
- Full (strict) ensures Cloudflare only connects to Webflow if the certificate is valid and trusted.
- This gives you true end-to-end encryption without loopholes.
⚠️ Important: Because Webflow relies on Cloudflare under the hood, turning on the Cloudflare proxy at your domain level without O2O will break SSL provisioning and renewal. With O2O configured correctly, Cloudflare knows how to handle the handshake so certificates continue working seamlessly.
If you're using DNS CAA records, make sure they allow Let's Encrypt and Google Trust Services.
Step 4: Verify your setup
Here's how to independently check that everything is working:
- DNS lookup – Use WhatsMyDNS to confirm
examplewebsite.comresolves to Cloudflare IPs (not Webflow's). - SSL Labs test – Run SSL Labs on your domain. You should see Cloudflare at the edge, with no cert errors.
- Headers check – Run:
curl -I https://examplewebsite.com
I hope this helps. I know it can be a bit nerve-wracking to do this when it feels like a bit of a workaround. If you need a bit more hand holding through the process, you can always contact Webflow's support team.